I recently started doing a little bit of food writing for Vista Magazine, a "leading Latino publication celebrating 25 years in print. Focusing on family, food, entertainment and lifestyle, Vista highlights Hispanic life. Plus, it reaches about 2 million readers per issue." Check out my first post, "Simple Smoothie Recipes with Peanut Butter and Bananas," for a ridiculously easy set of variations on a banana smoothie. Frozen bananas really make an awesome smoothie because they give it a thick, velvety texture that you don't really get from other fruits. Plus, testing these recipes gave me a chance to perfect my banana-opening technique! Turns out most of us open it from the "wrong" side. Monkeys do it from the other side, and it's actually easier. You don't squish the end, and you get a convenient handle. Life-changing skill right here, folks.

Showing posts with label vegetarian. Show all posts
Showing posts with label vegetarian. Show all posts
Saturday, December 1, 2012


Cauliflower "Risotto" (TEN Recipes)

Lately I've been spending most of my time preparing for TEN, an independent horror film that begins shooting next week. I'm acting in it as well as doing some behind-the-scenes work, particularly documenting the whole experience through photography and blogging. Since we have a cast and crew with varied dietary needs, it's easiest for us to maintain a vegetarian diet while we're all on set 24/7 for a week. There are some great cooks amongst the group, so I'll be sharing some recipes during the process. The first recipe is a cauliflower "risotto" (with vegan and non-vegan options) by Porcelain Dalya, who is playing a co-ed. Visit the TEN blog to see the recipe.
Wednesday, August 15, 2012
Mango Lime Ghost Chili Tofu Bites at Peace o' Pie
After lobster rolling around Harvard Square on Sunday, I had an extra hour to kill before a friend's birthday festivities at Deep Ellum. Earlier that day, I had seen an intriguing Facebook post from Peace o' Pie, the vegan pizza place right by Deep Ellum. They had a special: tofu bites in a mango, lime, ghost chili sauce. Serendipity. Always on the lookout for ways to bring my taste buds' hatred of me to fiery new levels, I knew how to kill the hour.
I walked to the counter and ordered my tofu bites, eliciting a slight eyebrow raise from the cashier. "They're very spicy," she warned. I was excited.

There were no open tables, so upon receiving my food, I wandered outside and crossed over to the mostly-concrete "park" in front of the fire station. Sitting alone and surrounded by construction and traffic, I gingerly picked up the first battered, bited-sized piece, making sure to keep one hand absolutely clean for the inevitable nose and eye-wiping that would soon take place.


There were no open tables, so upon receiving my food, I wandered outside and crossed over to the mostly-concrete "park" in front of the fire station. Sitting alone and surrounded by construction and traffic, I gingerly picked up the first battered, bited-sized piece, making sure to keep one hand absolutely clean for the inevitable nose and eye-wiping that would soon take place.

The first bite: exceptionally light, tasty batter. Perfect tofu texture. A slight hint of mango. Then, the familiar caustic burn of the pepper, not too bad at first, but lingering, then building. After a few deep breaths, trying to cycle some non-existent cold air into my mouth, I moved on to a second bite, and then I grabbed for my iced tea. Liquid, of course, actually makes spicy pain worse as it spreads the heat around, but the cool temperature of the tea provided some relief, albeit brief.
As I slowly made my way through several more bites, I waited for the familiar euphoria to set in, the light-headed high and feverish chills that make ultra-spicy food worth it for those who crave it. It didn't happen. The bites were strong enough to burn, but not so strong that they brought about the euphoric relief. They were trapped somewhere in the frustrating middle ground, somewhat painfully spicy with very little payoff. That's when I realized that I was sitting alone in a sad-looking park, torturing myself for no good reason. Extreme spiciness requires three things for an optimal experience: good flavor behind the burn, the aforementioned euphoria, and people with whom to share the challenge. These were pretty tasty (and I'd definitely recommend trying them if you're into ghost chili), but since I stupidly grabbed these alone and on-the-go, the experience lacked the fun of trying East Coast Grill's Pasta from Hell with a table of friends or serving my super spicy dark chocolate peanut butter cookies to (willing) victims.
Then it was time for drinks at Deep Ellum, and all was good. The only lingering memory of the ghost chili bites was a slight persisting tingle on my lips. No signs of pain.


...until 3 AM, at which point I woke up feeling like this:

If you do happen to venture to Peace o' Pie to try these out, I highly recommend also ordering the cheesy bread (not real cheese - everything there is vegan). I didn't get it this time (although I should have), but from a previous visit, I remember loving it.

Tuesday, March 6, 2012
Whip In (Fork it over, Austin! - Part I)
I've been in Austin for four hours now. I'm pretty sure I'll never leave.
I'm here for the week with some of my colleagues at Tasted Menu; we're attending SXSW Interactive and spreading the word about our iPhone app launch and our Austin launch. And eating everything in sight.
Famished by the time we landed in town around two in the afternoon, we decided on lunch at the strangely named Whip In, a convenience store/beer and wine shop/music venue/Indian restaurant just off of S. I35. Grungy on the outside; awesome on the inside.
I immediately fell in love and decided never to return home. Fancy beers, a wine tasting bar, an indoor stage and an outdoor stage...what's not to love? And the food...perfect. Just what we needed to kick off the trip.
I got an awesomely named "panaani" (naan + panini).

Alex and Sam got rice bowls.


We also tried the samosas.

We have so much eating to do in so little time that I doubt we'll have a chance to return, but if I lived in Austin, I'd definitely be a regular here.


Other posts in the Fork it over, Austin! series:
Part 2: Foreign & Domestic
Part 3: Caffe Medici
Part 4: Walking Along SoCo and Lunching at Chi'Lantro
Part 5: The Capitol, UT Austin, and Lunching (Again) at Torchy's Tacos
Part 6: Museum of the Weird
Part 7: Uchi
Part 8: East Side King at The Grackle
Part 9: Franklin Barbecue
Part 10: Flagship Whole Foods and My First Green Smoothie
Part 11: Late Night Pizza at Via 313
Part 12: Kebabalicious
Part 13: My Robotic Kitchen Planned This Dinner Party
Part 14: Papi Tino's
Part 15: Annie's Cafe & Bar
Part 16: The Peached Tortilla
Part 17: Cupcake Quest: Hey Cupcake!
Part 18: Arancini
Part 19: The DeLorean, Boxing Robots, and Roller Derby Pillow Fights
Part 20: Second Bar + Kitchen
Part 21: Tia Kelly's Navajo Tacos
Part 22: Hopdoddy Burger Bar
Part 23: Gourdough's
Part 24: The Ice Cream Social
Part 25: Walking to Barton Springs
Part 26: Izzos Tacos
I'm also posting daily recaps on the Tasted Menu blog, FOOD=LOVE:
Day 1: A First Taste of Austin
Day 2: Tons of Tacos, Sushi at Uchi, and a Late Night Trip to East Side King
Day 3: Early Morning Barbecue and Late Night Pizza
Day 4: Globetrotting: Kebabs, Enchiladas, Pommes Frites
Day 5-6: Meeting and Eating

I'm here for the week with some of my colleagues at Tasted Menu; we're attending SXSW Interactive and spreading the word about our iPhone app launch and our Austin launch. And eating everything in sight.
Famished by the time we landed in town around two in the afternoon, we decided on lunch at the strangely named Whip In, a convenience store/beer and wine shop/music venue/Indian restaurant just off of S. I35. Grungy on the outside; awesome on the inside.
I immediately fell in love and decided never to return home. Fancy beers, a wine tasting bar, an indoor stage and an outdoor stage...what's not to love? And the food...perfect. Just what we needed to kick off the trip.
I got an awesomely named "panaani" (naan + panini).

Alex and Sam got rice bowls.


We also tried the samosas.

We have so much eating to do in so little time that I doubt we'll have a chance to return, but if I lived in Austin, I'd definitely be a regular here.


Other posts in the Fork it over, Austin! series:
Part 2: Foreign & Domestic
Part 3: Caffe Medici
Part 4: Walking Along SoCo and Lunching at Chi'Lantro
Part 5: The Capitol, UT Austin, and Lunching (Again) at Torchy's Tacos
Part 6: Museum of the Weird
Part 7: Uchi
Part 8: East Side King at The Grackle
Part 9: Franklin Barbecue
Part 10: Flagship Whole Foods and My First Green Smoothie
Part 11: Late Night Pizza at Via 313
Part 12: Kebabalicious
Part 13: My Robotic Kitchen Planned This Dinner Party
Part 14: Papi Tino's
Part 15: Annie's Cafe & Bar
Part 16: The Peached Tortilla
Part 17: Cupcake Quest: Hey Cupcake!
Part 18: Arancini
Part 19: The DeLorean, Boxing Robots, and Roller Derby Pillow Fights
Part 20: Second Bar + Kitchen
Part 21: Tia Kelly's Navajo Tacos
Part 22: Hopdoddy Burger Bar
Part 23: Gourdough's
Part 24: The Ice Cream Social
Part 25: Walking to Barton Springs
Part 26: Izzos Tacos
I'm also posting daily recaps on the Tasted Menu blog, FOOD=LOVE:
Day 1: A First Taste of Austin
Day 2: Tons of Tacos, Sushi at Uchi, and a Late Night Trip to East Side King
Day 3: Early Morning Barbecue and Late Night Pizza
Day 4: Globetrotting: Kebabs, Enchiladas, Pommes Frites
Day 5-6: Meeting and Eating
Wednesday, December 21, 2011
Latkes and Sufganiyot for Chanukah (Tasted Menu)
Chanukah began Tuesday. While many celebrants focus on the eight days of gift-giving, food is a meaningful part of the holiday as well. In fact, tradition dictates that fried foods are to be eaten in celebration of part of the Chanukah story in which a tiny amount of oil miraculously kept the special Temple lamp burning for eight days, much longer than expected. It’s a bit of a stretch, I suppose, but hey, it’s a good excuse to chow down on fried food!
In celebration of the holiday, we’ve pulled together a list of the highest-rated, Chanukah-related, deep-fried dishes around town.
Read the rest of my blog post over on FOOD=LOVE, the TastedMenu.com blog.
Read the rest of my blog post over on FOOD=LOVE, the TastedMenu.com blog.
Sunday, December 4, 2011
Fractal Broccoli for Miss Lima

Miss Lima taught 10th grade geometry. At least I think it was 10th grade and I think it was geometry, but to be honest, high school memories are starting to get a little hazy. I can't even remember the names of all my teachers anymore. It's strange to think I used to have my entire week's schedule memorized to the minute. In any case, I do remember vague bits of a field trip Miss Lima organized. We went to a day-long fractal conference. A day. Of fractals. It was either at BU or MIT, and my dad was one of the chaperones.

Fractals are complex shapes made up of self-similar parts, which in turn are also made up of self-similar parts, and so on, theoretically to infinitely small self-similar parts. The Koch snowflake is a common visualization. Fractals occur in nature, but not quite as neatly as the theory dictates, of course. 'Infinitely small' is hardly possible in practical application. A few natural examples: ferns, lightning, blood vessel systems...and Romanesco broccoli (also called Romanesco cauliflower), a member of the broccoli and cauliflower species Brassica oleracea.

Two years ago, I learned that Miss Lima, who had since married and had three children, had died of breast cancer at only 39 years old. This post is dedicated to her. I'm still amazed that she was able to get a whole class full of high schoolers excited about a math field trip. I've hardly encountered fractals in an academic setting since then, but the memory has stayed with me.


We stopped by the Foxboro Cheese Co. stand to investigate whether they had goat cheese. They didn't, but we ended up with asiago (my favorite cheese) and a lemon honey fromage blanc, which seemed like a perfect accompaniment to the broccoli (instead of goat cheese). Yes, it was perfect.

Lightly season the broccoli with olive oil, salt, and pepper. Roast it at 425 for about 15 minutes. Remove it from the oven and add cheese (fromage blanc, goat, or your choice) and balsamic. We used a store-bought balsamic glaze rather than straight balsamic vinegar. Put it back in the oven for another three or four minutes, and then broil for a minute or two. Voila: cheesy roasted Romanesco broccoli with balsamic glaze. The flavor was a perfect mix of broccoli and cauliflower, fairly mild. Delicious, beautiful, and fleeting.

And then it was gone.
Even nature's not infinite, but it does a good job of convincing us otherwise.
Wednesday, November 2, 2011
How Sweet It Is: Follow the Honey (CBS Boston)
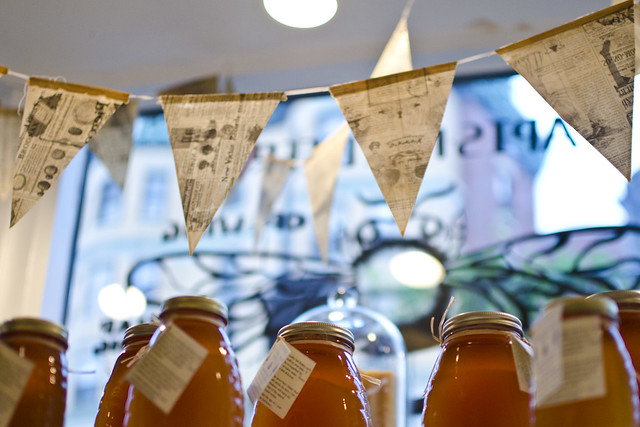
When I first walked into Follow the Honey, a new bee-themed boutique in Harvard Square, I expected a simple selection of honey and related knick-knacks. What I found was much more than that: plenty of honey and trinkets, yes, but also a staff so full of knowledge and enthusiasm that I left almost wanting to become a beekeeper myself.
Read the rest of my article over on CBS Boston.
More photos:
Sunday, October 2, 2011
Video: Super Spicy Dark Chocolate Peanut Butter Cookies
I wrote about these cookies back in March, but I figured they'd be a fun subject to revisit for another video post. Through the Foodbuzz Tastemakers program, I recently received a complimentary sample of Ghirardelli's new Intense Dark chocolates, and I had always wanted to try out the cookies with a darker chocolate (I used Ghirardelli 60% Cacao Chocolate Chips for all the other times I've baked these cookies.) Goodbye 60%, hello 86%!

Joel took a hammer to a couple bars: the 72% ("Twilight Delight") and the 86% ("Midnight Reverie"). We were afraid to make the cookies too bitter, so we included about a 2:1 ratio of the twilight to the midnight. (As for the leftover chocolate? Well, let's just say there's no such thing as leftover chocolate.)
The result? The most delicious batch of the spicy cookies that we've ever made...but it was also the least spicy. I think I used the same amount of ghost chili powder and salt as usual - except for that one time when I was a bit tipsy and included a heaping spoonful of the powder - so I'm guessing maybe the stronger, darker chocolate masks the spice a bit more. Upon eating the cookies, I still got the strange chill and euphoria that ghost chili seems to trigger for me. In any case, these remain my favorite cookies to bake - and to share with unsuspecting friends!

If you'd like to download or print the recipe, check out the PDF version here.
Links to stuff mentioned in the video:
- The recipe that inspired this one: "Dark Chocolate Cookies with Espresso Salt" by Bianca Garcia (Confessions of a Chocoholic)
- Ghost chili products online: ghost chili sea salt at saltworks.us and ghost chili powder at bhut-pepper.com (I've also found part of the bhut-pepper.com product line at The Meat Hook in Brooklyn, NY.)
- Dried ghost chilis available locally: Christina's Spice and Specialty Shop (Inman Square, Cambridge, MA)
Special thanks to Joel Edinberg, who (a) helped me shoot the video, particularly when I'm the one on screen, (b) helped me bake and eat the cookies, and (c) did all of the music/sound work, including writing, performing, and recording the music, recording my voiceovers, and tracking down the perfect cat and elephant noises.
Also, thanks to several of my co-workers, who, with varying levels of enthusiasm, allowed me to record video of them tasting the cookies: Rob Ciampa, Yelena Kadeykina, and Theresa Moore.
Friday, August 19, 2011
Potato and Poblano Pepper Wontons

I'm on a wonton wrapper kick. These things are great. You can put just about anything in them, and there are plenty of ways you can cook them. Earlier this week, I made kale ravioli in a thyme-lemon broth and tomato and goat cheese wonton cups with balsamic glaze. Last night: potato and poblano pepper wontons.

Nearly everything going on in my kitchen lately is an attempt to plow through as many CSA vegetables as possible. I don't think we've ever been able to completely finish a week's share without letting a few things go to waste; we need to get better.
Since the earlier recipes were boiled, baked, and not actually wontons, we decided to do a simple steamed wonton with some of our CSA veggies. We'll probably try out fried wontons next!
Recipe: Potato and Poblano Pepper Wontons
Ingredients
- wonton wrappers
- potatoes (we used the Katahdin variety)
- poblano peppers
- soy sauce
- dipping sauce of your choice (we used a ginger soy sauce and a store-bought spicy dumpling sauce)

- Finely chop potatoes and peppers into small cubes or chunks. Optional: remove pepper seeds for less heat.
- Pan fry potatoes and peppers to desired doneness. (Trying putting the potatoes in first and adding the peppers as the potatoes began to brown.) Include a splash of soy sauce.
- Place small spoonfuls of the potato and pepper mixture into the center of each wonton wrapper and fold according to the directions on the package (or get creative and do your own thing).
- Place the wontons into a steamer basket. Steam for 5-10 minutes.
- Serve with a dipping sauce or two. We used a ginger soy sauce and a store-bought spicy dumpling sauce.


Monday, August 15, 2011
Kale Ravioli in Thyme-Lemon Broth
Today's relentless drizzle and moody grey sky signaled the quickly coming autumn, but I think we still have a little bit of summer sun left to enjoy. Tonight's dinner was the perfect bridge between the seasons: soup for warmth, but a light and lemony soup filled with flavors of the warmer months.

As usual, I'm trying to burn through the impossible amount of vegetables I've received in my CSA, so I decided to throw together this week's curly kale with some wonton wrappers I already had (from last week's tomato and goat cheese wonton cups). When the idea first came to mind a few days ago, I was thinking of a basic pasta dish with a tomato-based sauce, but yesterday, I found myself at Christina's Spice and Specialty Foods, where I picked up a jar of preserved lemons on a whim, quickly realizing that kale and lemons were a good match.

Wonton wrappers have so many uses! There were a million in the pack that I bought, so they'll probably be making appearances in a few more posts in the near future. For the kale, I just sauteed it in olive oil with some salt and crushed red pepper, and then I blanched it to keep it nice and green while I got everything else ready.

I had hoped to tie little knots of thyme around the tops of the raviolis, but this proved to be way too much work, so I just speared a few of them to add some color and flavor.

The fried garlic garnish was inspired by a Cambodian lime soup that I absolutely love - a sweet and sour broth with pineapple, shrimp, and some other tasty ingredients, including fried garlic. I also used a few thin slices of a preserved lemon as garnish. I'd never had these before; they added a subtly salty flavor along with the tartness, and the jar gave off an intoxicating scent when I opened it.
I accompanied the meal with some biscuits (the type made from store-bought dough), which I topped with Himalayan pink salt, another random purchase at the spice shop over the weekend.

Recipe: Kale Ravioli in Thyme-Lemon Broth
serves 2
Ingredients

As usual, I'm trying to burn through the impossible amount of vegetables I've received in my CSA, so I decided to throw together this week's curly kale with some wonton wrappers I already had (from last week's tomato and goat cheese wonton cups). When the idea first came to mind a few days ago, I was thinking of a basic pasta dish with a tomato-based sauce, but yesterday, I found myself at Christina's Spice and Specialty Foods, where I picked up a jar of preserved lemons on a whim, quickly realizing that kale and lemons were a good match.

Wonton wrappers have so many uses! There were a million in the pack that I bought, so they'll probably be making appearances in a few more posts in the near future. For the kale, I just sauteed it in olive oil with some salt and crushed red pepper, and then I blanched it to keep it nice and green while I got everything else ready.

I had hoped to tie little knots of thyme around the tops of the raviolis, but this proved to be way too much work, so I just speared a few of them to add some color and flavor.

The fried garlic garnish was inspired by a Cambodian lime soup that I absolutely love - a sweet and sour broth with pineapple, shrimp, and some other tasty ingredients, including fried garlic. I also used a few thin slices of a preserved lemon as garnish. I'd never had these before; they added a subtly salty flavor along with the tartness, and the jar gave off an intoxicating scent when I opened it.
I accompanied the meal with some biscuits (the type made from store-bought dough), which I topped with Himalayan pink salt, another random purchase at the spice shop over the weekend.

Recipe: Kale Ravioli in Thyme-Lemon Broth
serves 2
Ingredients
- Wonton wrappers (I used 18)
- Fresh thyme (a few sprigs)
- 2 cloves garlic
- 1 head curly kale
- Olive oil
- Salt
- Crushed red pepper (optional)
- 3 cans broth (I used low sodium chicken broth)
- 1 large lemon
- 1 preserved lemon (optional)
Instructions
- Combine three cans of broth and the juice of one lemon in a large pot. Add some thyme. Bring to a boil and then let simmer until everything else is ready.
- Wash the kale and tear into small pieces. Saute with olive oil, salt, and crushed red peppers (optional). Blanch.
- Spread out wonton wrappers on a clean, dry surface. Put a small spoonful of sauteed kale in the center of each.
- Wetting the edges of each wrapper, fold raviolis. Follow the directions on the wonton wrapper package or do your own thing. Work quickly; the wrappers get harder to manipulate the longer they've been sitting out on the table.
- Get some water boiling. In the meantime, prepare the garnish: slice up the preserved lemon and fry some minced garlic.
- Cook the ravioli for about three minutes in the boiling water. Drain and combine with the broth. Garnish with preserved lemon slices and fried garlic.
Thursday, August 11, 2011
Tomato and Goat Cheese Wonton Cups with Balsamic Glaze
The title really has all the information you need to make this ultra-simple appetizer!

I got cherry tomatoes in my CSA today, which led me to make these. I ended up eating the whole batch, accompanied by a nice cold bottle of Unibroue Éphémère, while watching The Piano on Netflix. I can't believe I had made it through 20+ years as a pianist without watching this movie.
By the way, these are obviously extremely customizable. Have fun! I think some fresh basil would have tasted great with the tomatoes and goat cheese.

Tomato and Goat Cheese Wonton Cups with Balsamic Glaze
Serving: 12 cups
Ingredients


I got cherry tomatoes in my CSA today, which led me to make these. I ended up eating the whole batch, accompanied by a nice cold bottle of Unibroue Éphémère, while watching The Piano on Netflix. I can't believe I had made it through 20+ years as a pianist without watching this movie.
By the way, these are obviously extremely customizable. Have fun! I think some fresh basil would have tasted great with the tomatoes and goat cheese.

Tomato and Goat Cheese Wonton Cups with Balsamic Glaze
Serving: 12 cups
Ingredients
- 12 cherry tomatoes
- Goat cheese (lots!)
- Balsamic glaze (It can usually be found in the same aisle as balsamic vinegar.)
- 12 wonton wrappers
- Fresh basil (optional)
Instructions
- Pre-heat the oven to 375F.
- Grease a muffin pan.
- Put a wonton wrapper in each cup of the muffin pan.
- Bake the wrappers for five minutes.
- Take the muffin pan out of the oven and put in all of the fillings. (You can add the glaze now or at the end; it's up to you!)
- Bake for another three to five minutes.

Tuesday, June 21, 2011
The Weekly Vegetable: Spicy Cheesy Kale Chips
Joel and I received a Facebook event invitation from a friend for a potluck dinner dubbed Epic Feast 1, taking place outdoors at a farm in Concord on a Sunday night. (Epic Feast 2, which will be in October, is supposed to really be epic, complete with a whole roasted pig, but the prequel is just a small, friendly potluck.)
Joel made mandel bread (mandelbrodt - Yiddish for almond bread) - a recipe from an aunt's cousin or a cousin's aunt or somebody somewhere on his family tree. He had raved about his amazing mandel bread in the past, but this is the first time I've gotten to try it. It was amazing. I'll post the recipe at a later date if he lets me!
I decided to make use of more of our Week 1 CSA goodies by making kale chips. I've made them once before and they came out great, but that was with curly kale, which seems to be the type featured in most recipes I've seen. I had red Russian kale, though, so I wasn't sure if it would work - I think it's a bit thicker than curly kale, and less...curly.
Since I'm addicted to spiciness, I complemented the kosher salt with a generous pinch (or several) of ghost chili sea salt. I also boosted the heat with a dash of chili-infused oil in addition to the regular olive oil. Since I had some shaved asiago cheese lying around, I sprinkled it on top.
The first batch were kind of fail chips rather than kale chips. Just a bit overdone. Gotta watch these things like a hawk...they go from perfect to fail within seconds. Anyways, this one is a work in progress. People seemed to like the results, but it took me several batches to really get the timing down, and even then, they looked pretty ugly. Pictured below is the first batch, which was the biggest fail.

By my fourth batch, things were looking up:

Check out the CSA Week 1 intro post to learn more about what was in this week's share.
Joel made mandel bread (mandelbrodt - Yiddish for almond bread) - a recipe from an aunt's cousin or a cousin's aunt or somebody somewhere on his family tree. He had raved about his amazing mandel bread in the past, but this is the first time I've gotten to try it. It was amazing. I'll post the recipe at a later date if he lets me!
I decided to make use of more of our Week 1 CSA goodies by making kale chips. I've made them once before and they came out great, but that was with curly kale, which seems to be the type featured in most recipes I've seen. I had red Russian kale, though, so I wasn't sure if it would work - I think it's a bit thicker than curly kale, and less...curly.
Since I'm addicted to spiciness, I complemented the kosher salt with a generous pinch (or several) of ghost chili sea salt. I also boosted the heat with a dash of chili-infused oil in addition to the regular olive oil. Since I had some shaved asiago cheese lying around, I sprinkled it on top.
The first batch were kind of fail chips rather than kale chips. Just a bit overdone. Gotta watch these things like a hawk...they go from perfect to fail within seconds. Anyways, this one is a work in progress. People seemed to like the results, but it took me several batches to really get the timing down, and even then, they looked pretty ugly. Pictured below is the first batch, which was the biggest fail.

Ingredients
|
| Directions Pre-heat the oven to 350F; cover a baking sheet with foil or parchment paper. Rip kale leaves off of the stems, wash, and tear these into the desired size. (Think potato chips.) I discard the stems - is there anything you can do with them? They seem so tough. In a large bowl, drizzle a generous amount of oil(s) on the kale and mix thoroughly so all leaves are coated (like a well-dressed salad - not drowning). Add salt and any additional seasoning you'd like to add, and mix again. Arrange in a single layer on the baking sheet and sprinkle cheese on top. Set a timer for 8 minutes, but start checking on the chips a few minutes earlier than that. You want to take them out when they're just starting to get crispy around the edges, before they've turned brown all the way through. |
By my fourth batch, things were looking up:

Check out the CSA Week 1 intro post to learn more about what was in this week's share.
Monday, June 20, 2011
The Weekly Vegetable: Kohlrabi and Beet Salad with Cilantro Dressing

Another day, another CSA meal! Ok, we're only two days in. I hope I'll still be this enthusiastic come November.
The main course Friday night was barbecued chicken drumsticks that we had started marinating a couple days before. They grilled up perfectly. On the side, though, we made a salad that was bursting with leafy green CSA goodness.
Ingredients for the salad
Ingredients for dressing
|
| Directions Combine all the ingredients for the dressing in a blender until the cilantro is finely chopped. Peel the kohlrabi and chop it as desired. Have you eaten kohlrabi before? It has the texture of apple slices but the taste of a broccoli stem. Chop the beets as desired; julienned works well here. Combine the kohlrabi, beets, all the leafy greens, the chopped Swiss chard stalk, and any other ingredients you wish, and dress it. |
This was a substantial salad! With a couple more ingredients, it could probably stand on its own. I'd add goat cheese next time.

Sunday, June 19, 2011
The Weekly Vegetable: Pan-Fried Gnocchi with Spicy Sauteed Greens
For the first meal made with CSA ingredients, I was thinking big. I was honestly thinking of preparing everything from yesterday's "menu exercise" post. But by the time I picked up my share and dragged it - plus other assorted groceries - home, I was sweaty and grouchy and wanted something much less involved. I decided to push the elaborate salad until the next day and just focus on the gnocchi, which would only require a couple of the vegetables, particularly ones that didn't have to be chopped in difficult ways. I also took the logical shortcut and bought prepared gnocchi at Shaw's.
This dish was ridiculously easy to make. By the way, most of these CSA "recipes" that I share with you won't have exact amounts or cooking times. They're designed to be easy starting points for improvisation. (And by "designed," I really mean that I threw a bunch of stuff together in the kitchen, it actually worked out, and now I'm sort of telling you how to replicate it.)
Ingredients
|
| Directions Start boiling water for the gnocchi. While it's heating up, get your greens washed and torn and ready to be sauteed. Chop up a clove or so of garlic as well. Cook the gnocchi once the water's boiling; the prepared gnocchi that I bought only needed about two minutes.
Drain the gnocchi and set it aside for a moment. Heat up some oil and the chopped garlic in a pan large enough to accomodate all the greens. (Keep in mind that greens like kale cook down a lot, so use more than you think you want.) Once the oil is hot, add the gnocchi. Don't shake it around too much at first - let one side start getting crispy.
When the gnocchi is almost fried as much as you want, add the greens and the Frank's. (Give it a generous drizzle of Frank's if you like some heat. This is one of the main components of the original Buffalo wing sauce, folks. This and butter.)
Finally, add some tomatoes - diced or however you prefer. Cook everything to the desired doneness. It'll probably only need a minute or so more at this point.
|
That's it! Not very ambitious...but it was delicious!

Thursday, March 10, 2011
Spicy Cookies with Chocolate, Peanut Butter, and Ghost Chili

These cookies are a huge hit with my friends who either love spicy food or love torturing themselves. Ghost chili is addictive: it burns, but then it triggers this strange euphoria that leaves you wondering when you can get your next spicy fix. (This song plays on repeat in my head when eating anything containing ghost chili. Don't try to read too much into that; I have no clue what the lyrics mean, but we love the pain and want some more of it seems to apply!)
These spicy cookies came about after I saw Bianca's recipe for Dark Chocolate Cookies with Espresso Salt on her blog, Confessions of a Chocoholic. I had already experimented with brownies topped with ghost chili sea salt (success!), and I wanted to expand the idea to cookies, dark chocolate cookies in particular. (I also love to put this salt on top of dark chocolate ice cream!) When I saw Bianca's dark chocolate cookies topped with a fancy espresso salt, I figured it'd be easy enough to replace one salt with another. The result? Amazing.
This is such an easy batter. It's basically chocolate peanut butter (a lot of it) with a few other things mixed in. There is no way these cookies are remotely healthy.
I followed Bianca's recipe almost exactly: mix together one cup of chocolate peanut butter (she and I both used Peanut Butter & Co. Dark Chocolate Dreams), one cup of light brown sugar, 1/4 cup of white sugar, one egg, one tablespoon vanilla extract, one cup of dark chocolate chips (we both used Ghirardelli 60% Cacao Chocolate Chips, although I'd go even darker if I found something in the 70% range next time), and three tablespoons dark chocolate cocoa powder or hot chocolate blend (I used Green and Black's Organic Cocoa Powder). You should preheat your oven to 350 somewhere along the way as well.
I added one extra ingredient to the mix: ghost chili powder, about a half teaspoon. I order mine online. (Spicy addition #1...there's more to come!) I guess you could skip this step...or maybe some cayenne would do the trick. (It wouldn't be nearly as spicy, but it'd be something, at least.)
The first time I made this recipe, it made about two dozen, as Bianca indicates. Tonight, though, I must have gotten overzealous and ended up with twelve huge cookies. I hope they're cooked all the way through...they're cooling at the moment, but I guess I'll find out soon! In any case, once you portion out the batter onto the baking sheet, that's when spicy addition #2 comes in! Instead of espresso salt, get out your ghost chili salt and sprinkle it generously on the top of each cookie. What? You don't have ghost chili salt? Order it now. No, I'm not being paid to say this. I'm just frighteningly addicted to this stuff. It's good on everything. Ice cream, popcorn, salads, cookies, steak, chicken, fish...get it now.
Bake for 12-15 minutes at 350. Since my cookies ended up nearly double-sized this time, I left them in for an extra five minutes or so.
These cookies are The Lights Out-approved and also get a thumbs up from most of the non-vegan section of The Michael J. Epstein Memorial Library. These will have to be my go-to treat for all music-related gatherings now!
These cookies will melt your face off.
Here's a PDF version of the recipe if you'd like to print or download it.
Here's a newer post about the cookies, including a video!
Saturday, January 29, 2011
Masochistic Mac and Cheese
I'm in the process of putting together a Boston Food Bloggers macaroni and cheese recipe index, much like this under-construction cookie one. I've been adding to it bit by bit over the last week or so, and this task unsurprisingly triggered a massive mac and cheese craving. (Update: Here's the link!)
As a kid, I'd only eat Kraft mac & cheese - especially the fun shapes! - and it had to be the stove-top version. Easy Mac is disgusting. Here's the weird thing, though: I wouldn't touch homemade macaroni and cheese. Once I hit college, I branched out ever so slightly to Annie's microwaveable mac and cheese. It was quick and easily do-able in my dorm room microwave, and it didn't taste too bad. But I still wouldn't go near homemade. I just didn't like cheese enough.
Now, though, I'm finally turning into a cheese fiend, so putting this index together inspired me to try my own homemade mac & cheese. It was also my first time making a roux, and I thought it was going to fail epically, but the end result was actually pretty awesome.
Why "masochistic"? Ghost chili powder. And a little bit of hot sauce, too.

Masochistic Mac and Cheese
These measurements yielded four medium-sized portions. Tasted great as leftovers!
While the water was heating up, I grabbed a giant pot and melted the butter in it. Once it was melted, I whisked in the flour. This didn't go so well...I ended up with a couple giant chunks of flour, and not much liquid. Next, though, I started slowly adding in the milk, and it started getting saucier. (Note: warm your milk before adding it.) This part requires some vigorous whisking. Keep going and going and going until you have a thick, bubbling sauce. (Meanwhile, is your water boiling yet? Put the pasta in!) Lower the heat on the saucepan and add your seasonings, followed by a good portion of your cheese - about two-thirds. Keep mixing until everything is nicely melted and mixed. Taste it. Adjust the seasonings until you're happy. This is where I added a ton of ghost chili powder. Woohoo!
When your pasta is about 2-3 minutes away from the doneness recommended on the package, take it off the heat, drain it, shock it in some cold water, and drain it again.
Once you've got your pasta and your sauce, mix them together.
Pour the cheesy pasta mixture into a greased casserole dish. Top the whole thing with breadcrumbs, the rest of the cheese, a big drizzle of truffle oil, and any other seasonings. (I added more ghost chili powder here, for good measure.)
Stick it in the oven for about 30 minutes. Mine was done in about 25; my oven runs hot. You want the breadcrumbs nicely browned (but not burnt) and the cheese wonderfully melted. Most recipes say to let it sit for a bit. We were too hungry.
We drizzled a bit of hot sauce on top after taking it out of the oven. You can never have too much spice!
I was shocked that this turned out so well. When making the roux, I couldn't get the flour to fully incorporate, so I was worried I'd end up with little chunky flour pockets. Fortunately they disappeared into the mix somewhere!
As a kid, I'd only eat Kraft mac & cheese - especially the fun shapes! - and it had to be the stove-top version. Easy Mac is disgusting. Here's the weird thing, though: I wouldn't touch homemade macaroni and cheese. Once I hit college, I branched out ever so slightly to Annie's microwaveable mac and cheese. It was quick and easily do-able in my dorm room microwave, and it didn't taste too bad. But I still wouldn't go near homemade. I just didn't like cheese enough.
Now, though, I'm finally turning into a cheese fiend, so putting this index together inspired me to try my own homemade mac & cheese. It was also my first time making a roux, and I thought it was going to fail epically, but the end result was actually pretty awesome.
Why "masochistic"? Ghost chili powder. And a little bit of hot sauce, too.

Masochistic Mac and Cheese
These measurements yielded four medium-sized portions. Tasted great as leftovers!
- 3 tablespoons butter
- 2 3/4 cups milk (I used 2% - probably best not to use skim.)
- 3/4 cup flour
- Salt and pepper
- Bread crumbs (I used store-bought regular ones. You can make your own if you feel so inclined.)
- Generous drizzle of truffle oil (I used white. I don't know much about truffle oil, so I can't really tell you if black or white would taste better here. It's a pretty subtle addition anyway.)
- Ghost chili powder (or your choice of a spicy addition: chili powder, cayenne pepper, etc. I bought my ghost chili powder here.)
- Hot sauce of your choice
- Cheese (I used 2 cups cheddar - Cabot's "Seriously Sharp", 1/2 cup Gruyere, and 1/2 cup Romano. I thought about using Asiago, which is my favorite cheese, but it melts kind of strangely so I wasn't sure it'd work well.)
- Pasta (I used about half a box of mezzi rigatoni.)
While the water was heating up, I grabbed a giant pot and melted the butter in it. Once it was melted, I whisked in the flour. This didn't go so well...I ended up with a couple giant chunks of flour, and not much liquid. Next, though, I started slowly adding in the milk, and it started getting saucier. (Note: warm your milk before adding it.) This part requires some vigorous whisking. Keep going and going and going until you have a thick, bubbling sauce. (Meanwhile, is your water boiling yet? Put the pasta in!) Lower the heat on the saucepan and add your seasonings, followed by a good portion of your cheese - about two-thirds. Keep mixing until everything is nicely melted and mixed. Taste it. Adjust the seasonings until you're happy. This is where I added a ton of ghost chili powder. Woohoo!
When your pasta is about 2-3 minutes away from the doneness recommended on the package, take it off the heat, drain it, shock it in some cold water, and drain it again.
Once you've got your pasta and your sauce, mix them together.
Pour the cheesy pasta mixture into a greased casserole dish. Top the whole thing with breadcrumbs, the rest of the cheese, a big drizzle of truffle oil, and any other seasonings. (I added more ghost chili powder here, for good measure.)
Stick it in the oven for about 30 minutes. Mine was done in about 25; my oven runs hot. You want the breadcrumbs nicely browned (but not burnt) and the cheese wonderfully melted. Most recipes say to let it sit for a bit. We were too hungry.
We drizzled a bit of hot sauce on top after taking it out of the oven. You can never have too much spice!
I was shocked that this turned out so well. When making the roux, I couldn't get the flour to fully incorporate, so I was worried I'd end up with little chunky flour pockets. Fortunately they disappeared into the mix somewhere!
Thursday, July 22, 2010
Clover Food Lab
Another day, another food truck! I had so much fun acquiring lunch from the Fillbelly's comfort food truck on Tuesday that on Wednesday I decided to venture farther to try out another truck I've had my eye on: Clover Food Lab.
After over a year of success near MIT, the Clover folks decided to add a second location at Dewey Square, right outside of South Station, which is just a twenty minute walk from my office near Copley. (This was a surprise for me - I never realized it was so close!)
Clover offers gourmet vegetarian breakfast, lunch, and dinner options every day: some seasonally changing staple sandwiches and salads as well as specials announced on Twitter.
When I arrived at 12:30 on Wednesday, the line was 23 people deep, but it moved fairly quickly. Five workers danced around each other surprisingly efficiently inside the tiny truck, building BBQ seitan sandwiches, pouring blueberry lemonade, frying rosemary fries. Two others, adorned with green Clover trucker hats, stood outside the truck: one took orders, one called out names to deliver the goods to the waiting hoards.
I ordered a ginger lemonade ($2), carrot citrus salad ($3), and rosemary fries ($3). In case you don't carry lunch money, both trucks now have credit card machines.

I sat down on the comfy-looking grassy part of Dewey Square for a few minutes before realizing that the grass was leaving embarrassing wet spots on the back of my jeans. While I was there, I started sipping my ginger lemonade: very refreshing, but not as gingery as I had hoped. It tasted like high quality plain lemonade with the subtlest hint of something that almost tasted like ginger. I wish I had tried the day's special, blueberry lemonade ($3).


After over a year of success near MIT, the Clover folks decided to add a second location at Dewey Square, right outside of South Station, which is just a twenty minute walk from my office near Copley. (This was a surprise for me - I never realized it was so close!)
Clover offers gourmet vegetarian breakfast, lunch, and dinner options every day: some seasonally changing staple sandwiches and salads as well as specials announced on Twitter.
When I arrived at 12:30 on Wednesday, the line was 23 people deep, but it moved fairly quickly. Five workers danced around each other surprisingly efficiently inside the tiny truck, building BBQ seitan sandwiches, pouring blueberry lemonade, frying rosemary fries. Two others, adorned with green Clover trucker hats, stood outside the truck: one took orders, one called out names to deliver the goods to the waiting hoards.
 |
| The Financial District worker bees line up, staring at their smartphones until it's time to eat. |

I sat down on the comfy-looking grassy part of Dewey Square for a few minutes before realizing that the grass was leaving embarrassing wet spots on the back of my jeans. While I was there, I started sipping my ginger lemonade: very refreshing, but not as gingery as I had hoped. It tasted like high quality plain lemonade with the subtlest hint of something that almost tasted like ginger. I wish I had tried the day's special, blueberry lemonade ($3).
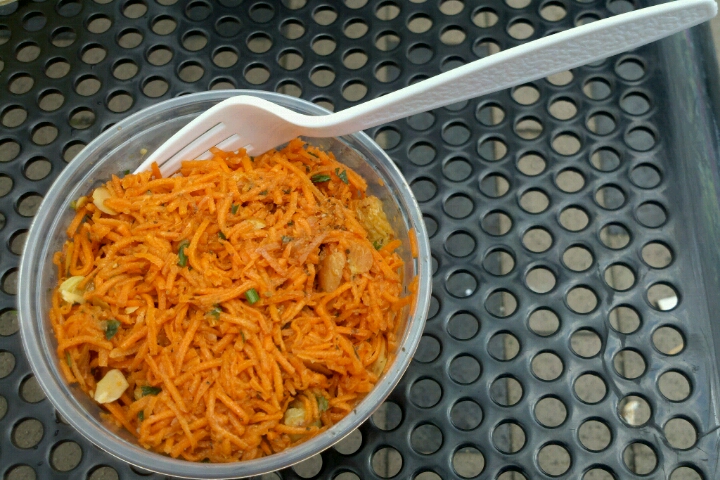
I moved to a bench and spent the rest of the meal fending off pigeons and gusts of wind. Despite its negative aspects, though, eating outside is really a wonderful thing, especially in the middle of a workday. The carrot salad was, well, quite carroty - in a good way! There were some sliced almonds in there, big squishy yellow things that I think were giant raisins, and a few other assorted ingredients, but this was pretty much a container of shredded carrots in vinaigrette. I could feel my eyesight improving as I ate it. (Just kidding about the eyes, but my skin does look faintly orange today.)

Rosemary fries, how I wish you weren't a mile away from my office. On second thought, it's a good thing you're far away. You're just too delicious for my own good. At the bottom of the stack, I found a ton of fresh rosemary, so these things are the real deal. Get them.
It was worth the mile there and the more-than-a-mile-because-I-took-a-wrong-turn back. It's great to find fast, healthy food coming from a truck. Don't get me wrong - I love a good late night street meat impulse buy, but it's nice that other options are starting to exist.
On Clover Food Lab's website, they mention a plan to open fast food restaurants eventually; the trucks are just a way to get things moving for now. I think a Clover fast food restaurant would be a welcome addition to Boston!
Gratuitous shots of the Dewey Square area using cheesy "toy camera" filter on new cell phone:


Clover Food Lab is a wonderful pick-me-up on a hectic day. As their motto says, "Everything will be different tomorrow," definitely something to keep in mind on that painful Monday morning or the endless Friday afternoon!
Follow Clover Food Lab on Twitter (@CloverDwy for South Station and @CloverFoodTruck for MIT) to find out about daily specials, like 3pm plantains!
Subscribe to:
Posts (Atom)
